Showing posts with label Harp Mic. Show all posts

Saturday, December 5, 2015

More On the Vintage Mic!

Made a lot more progress on the mic. After getting all of the electrical work and the details worked out, I tore it back down and bagged all the parts.

With the parts all bagged, I removed the badge on the front and got the shell ready to strip down.

Stripping down the shell was easy with some wet/dry 220 and some Dawn soap in the hot water. Very easy to get all of the paint of and back down to bare metal. I then did some shaping of the casting with some emery paper.
Next up, it was time to get this shell mounted on a stick and get some primer on it. I took my time laying the primer and laid several light coats, with baking over the heater between each coat.
 

I let the primer cure for several days over the heater and then wet sanded it with 400 wet/dry and laid 2 more coats before allowing 2 more days of curing. Then it was time to move on to color.
 
Initially, I was planning to paint it with some House of Color 'Black Diamond', but unfortunately the black diamond was really a top coat for some other color, not a base. As a result, I went back to my original plan of painting it with a nice metallic blue.
 
I shot about 5 coats of the blue, starting with some light coats and eventually moving to one final wet coat. The result was something pretty nice. Overall, I'm pretty happy with it.
 
Next up, I'm planning to see if I can ghost on some music notes or something similar in a pearl or other nice effect.


Friday, November 27, 2015

Finally A Good Blues Rig!

I've been playing through a series of different solid state amps for some time now. I've learned how to get the best tone from them, but at the end of the day, they are not a vintage tube amp, and they don't have the tone that I really wanted.

Searching Craigslist and Ebay and other sources had yielded a number of different good amps to buy in the 5 watt range ( Champ 500, VHT Special 6, etc) but every time I'd call on one, it was gone. What I really wanted was a Kalamazoo amp like Greg Heumann sells.

A couple days ago however, a Craigslist add popped up for a Gibson Skylark GA-5T. Looking it over in the add, it sure looked like a Kalamazoo. Some Googling yielded that it was made in the Kalamazoo factory. I don't yet know however if it is exactly the same circuit. More Googling to be done on that.

So I headed out to the shop and they had the amp. It was/is in awesome condition. I played it and several other 5 watt amps and this one beat the others hands down in the tone area. Price wise, I think they had it underpriced by about half- that did not bother me a bit. I walked out the door with the amp and its in my woodshed now for some playing. I'm still learning how to get the most out of it, but its got tone for days!
 
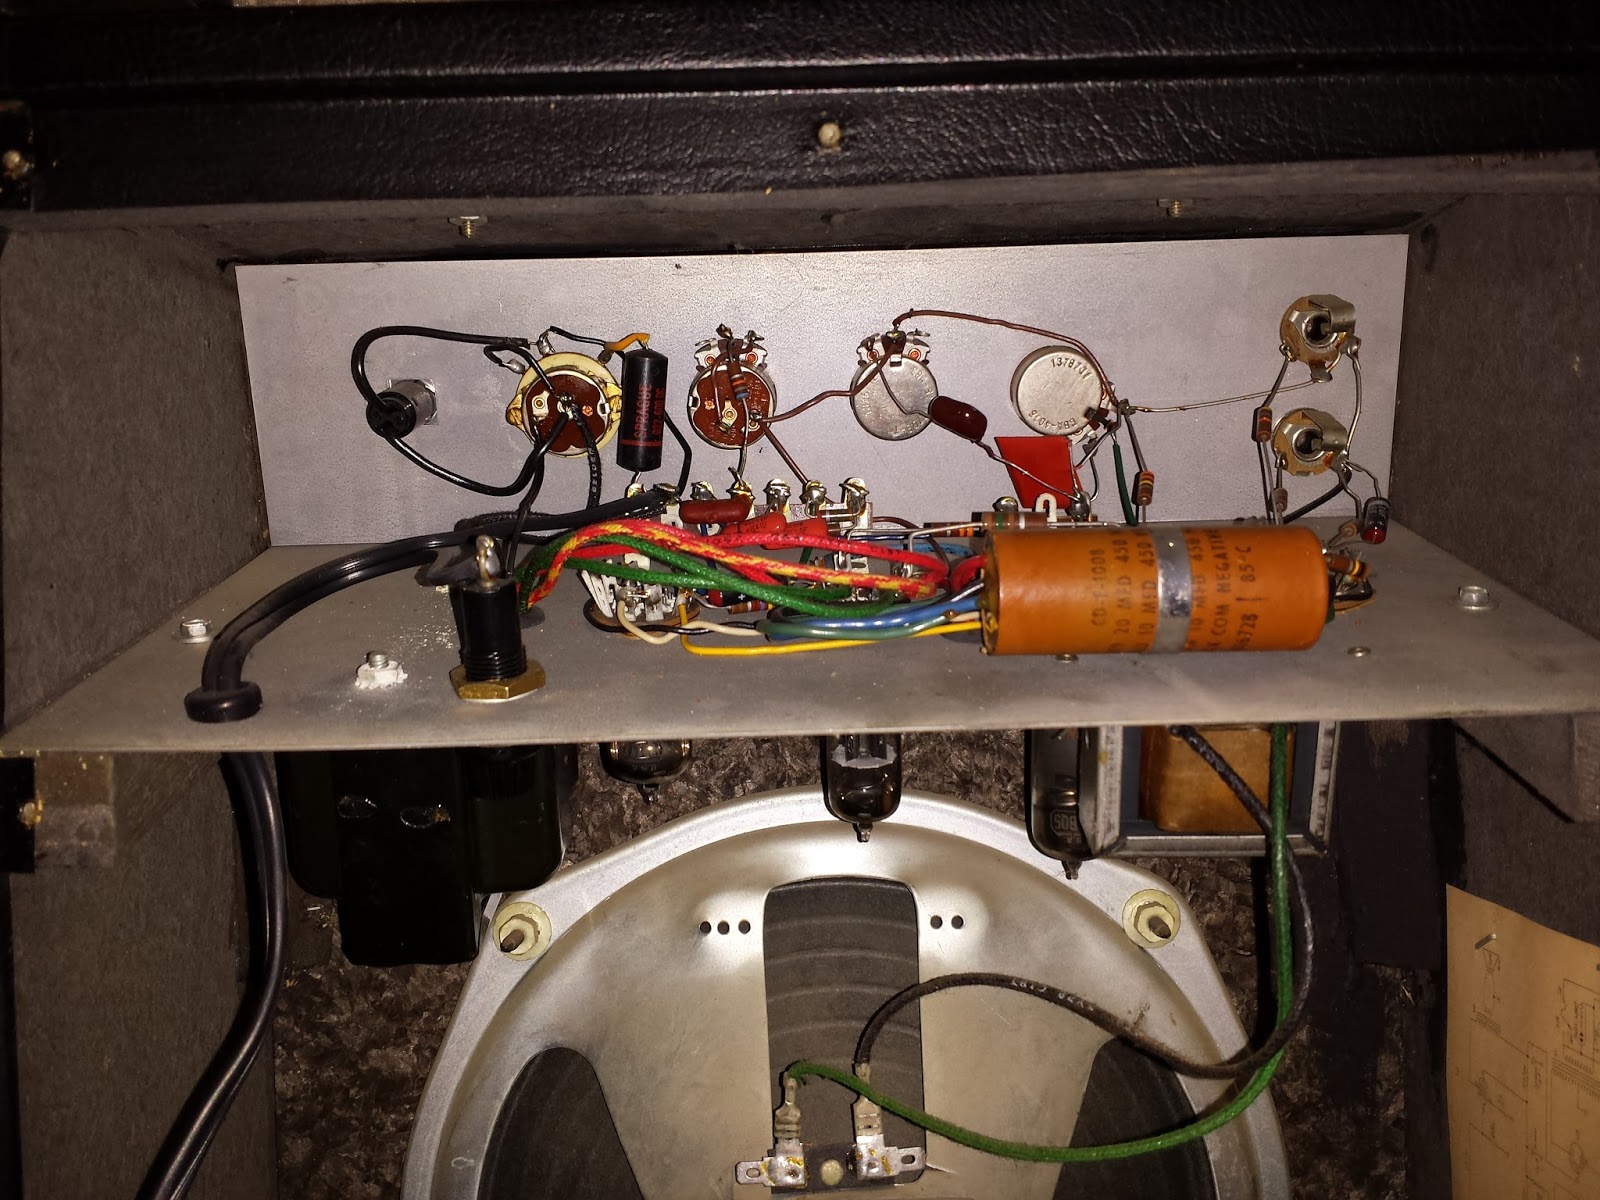
Opening up the amp, I can tell first that the covers have never been off, and that its never been worked on. This amp is perfect, just like it left the factory.


Thursday, November 26, 2015

More Progress On the New Mic....

So I made some more progress on this mic.

First up, I had to find a good pot (potentiometer) for the volume control. That took a bit of doing. I ended up with a 5 meg ohm pot that I bought from Digikey. Pricey little thing, but it had a 22mm (basically 7/8") long shaft, which was necessary to get through the body of the mic. It also has a very small body itself, which fits behind the element nicely.

To make this fit, I had to drill out the hole that was previously used for the ground. This started as a hole for a 6-32 screw, and I progressively enlarged it with increasing bits up to the 1/4" hole needed for the pot. For those that have never seen one of these before, I'm putting a volume knob in the hole where the mic body would have been mounted on a post in its stock configuration.

The 'Before' picture.
 
And the 'After' Picture.
 
After that, I needed to drill out one of the molding posts to make a new ground. I actually decided to drill two of them before I painted it. Just in case I wanted to ground the pot and the element to opposite sides for some reason, or the tapping of one failed. I tapped this again for a 6-32 screw.


Now it is time to wire this thing back up. A couple minutes with my multimeter told me which pins on the pot were for control and which was ground. I soldered up the circuit. For those that I don't plan on desoldering for paint, I went ahead and heat-shrinked them. I left the others bare. Everything fits pretty nicely. I'll change out the wire coming from the Amphenol connector to a white wire for 'signal' to allow easy understanding of the circuit when I rebuild that portion.
 
 
With the wiring done, I was able to screw the thing back together and give it a go. I stole the knob off my other nice mic to give it a try (I ordered some good 1/8" post knobs that should arrive tomorrow that will go on this mic).
 
Results with the 5 meg ohm pot are dead on and exactly what I wanted. No tone change, just volume change.
 

Crushed blue velvet 'silk' to protect the element. 


Saturday, July 13, 2013

My First Custom Blues Harp Mic

Sorry for the non-mandolin content, but it is blues! Reality is that I've been playing blues harmonica since I was a kid. Learned from an old blues player in Arkansas how to bend notes and it was all downhill from there. Truth be told, I'm not great, but I enjoy it, and that is what really matters.

After listening recently to Blind Mississippi Morris down at BB's on Beale Street a number of weeks ago, I decided I was going to buy a good blues harp mic, so I could play amplified. I got lucky and found an old JT30 that someone had already done some customizing to. He had added an Amphenol connector and a volume knob. Unfortunately, he did both jobs wrong....


So, I got it home, and played on it, and it sounded/sounds awesome! As mentioned above however, when I opened the mic, I found a wiring mess.... I decided to clean up all the wiring and fix the Amphenol connector which he had simply drilled through and essentially eliminated the need for..

After figuring out the correct wiring for the connector and fixing that, I went after the volume pot wiring and the grounds. Finally, all of that was correct, and I could spend some time on paint!

I sanded the whole mic down to bare metal, and then primed it. A light sanding later, and I was able to airbrush on several nice coats of House Of Kolor Pavo Purple. Some good metalflake in it, so it really looks cool!

 
When the color was laid, I was able to go in with several light coats of clear, followed by one nice wet coat of clear. After all that was done, I buffed the whole thing out and waxed it. I'm really proud of the result as it turned out quite nicely.
 
I also ordered a new knob for the volume control, and put a new 'silk' in behind the grill. I cut that from an old cycling jersey which no longer fit me.
 
Most importantly, the thing sounds great, and I can make some pretty good sounding music on it.


I'm currently playing the mic through either my Vox DA5 or my Stella Cigar Box amp. Both actually sound pretty cool. The Stella setup is crunchier, but simpler, and the Vox has reverb and delay which sound good while playing blues harp.
 
Lots of fun!